• Photos of people, preferably full length, or copies
• Plain white office paper
• Paper glue or repositionable spray adhesive
• Dry toner laser photocopies of your photos in black and white
• Plain white (or pale) cotton table runner, or other natural, flat-weave fabric
• Citra Solv concentrate (available on Amazon )
• Scissors
• Sticky tape
• Sheet of glass (or other flat, smooth, hard surface)
• Small pot
• Brush
• Bone folder or old teaspoon
• Iron
• Old towel
Method
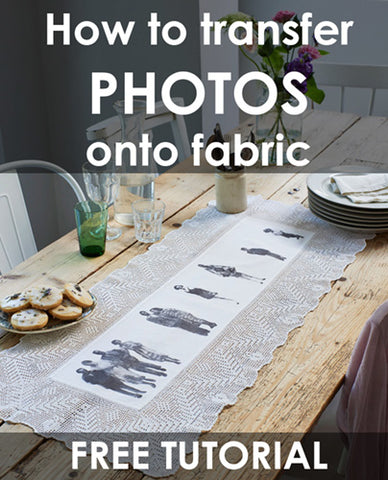
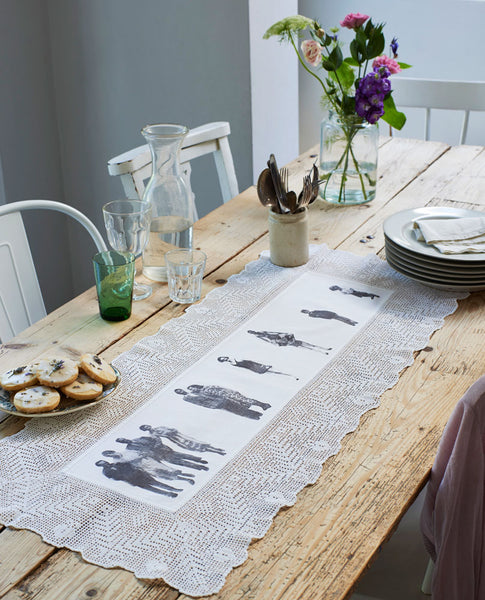
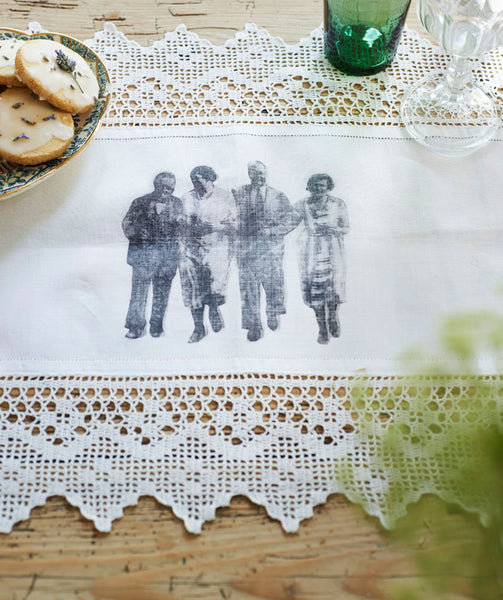
1 Cut around the edges of the people in your photographs—full-length photos (from head to toe) work best. Use copies if you don’t want to cut up original photos or they need resizing.

2 Using glue, stick the people down on plain white office paper, lining them up in rows with a space between each one. At a copy shop that uses a dry toner laser copier, photocopy each sheet of paper in reverse/mirror image in black and white. For best results, use high-contrast copies. If the copies are light, ask the copy shop to darken them one or two stops on their machine.
3 Lay the fabric out flat. Cut the paper to separate each person or group of people and decide where to place each one on the fabric.
(Lining up the feet to just above the bottom edge creates a neat effect).

4 Once you are happy with the layout, turn the papers over so that they’re image side down and stick a piece of sticky tape over the top edge of the paper to hold them in position.

5 Place the glass on a clean work surface, then lay the fabric flat over the top, paper side up, with the left-hand image centered over the glass. Pour a small amount of Citra Solv into a pot. Dip the brush in, then lightly brush over the back of the paper, starting in the middle. The paper will become semi-transparent and you only need to “paint” where your image is.

6 Holding the paper flat to the fabric with one hand, burnish over image with the rounded end of a bone folder or the back a teaspoon. Work quickly to avoid the Citra Solv evaporating. For larger images, apply the solution to small areas and burnish before moving on to the next area.

Checking your progress.
You can lift the paper to see the results, but if you need to burnish more be sure to lay it back down in exactly the same position to avoid blurring the image.
7 Once the first image has been transferred, remove the sticky tape and used paper from the fabric. Move fabric along to the left and align next taped paper over the glass base. Working from left to right, repeat the process until all the images have been transferred . Leave to dry.
8 Press the fabric (on medium heat with no steam) in a well-ventilated area to fix the print. Protect the ironing board with an old towel. It can now be washed as normal.
FURTHER IDEAS
• Use photographs from different times in one person’s life to create a personalized potted history. Or create family trees—just remember to leave room for new additions!
• This technique also works with color images (as long as they’re toner-based laser copies—inkjets won’t work).
• Instead of people, experiment with images of flowers, buildings, cars, or even more abstract imagery such as wrought-iron gates or other architectural decoration.
Find many more things to do with photos old and new in 'Photo Art' by Ellie Laycock.
![]()